Ever notice how skin or leaves in your paintings look flat and lifeless? No matter how many layers you add, they miss that soft inner glow that makes them pop.
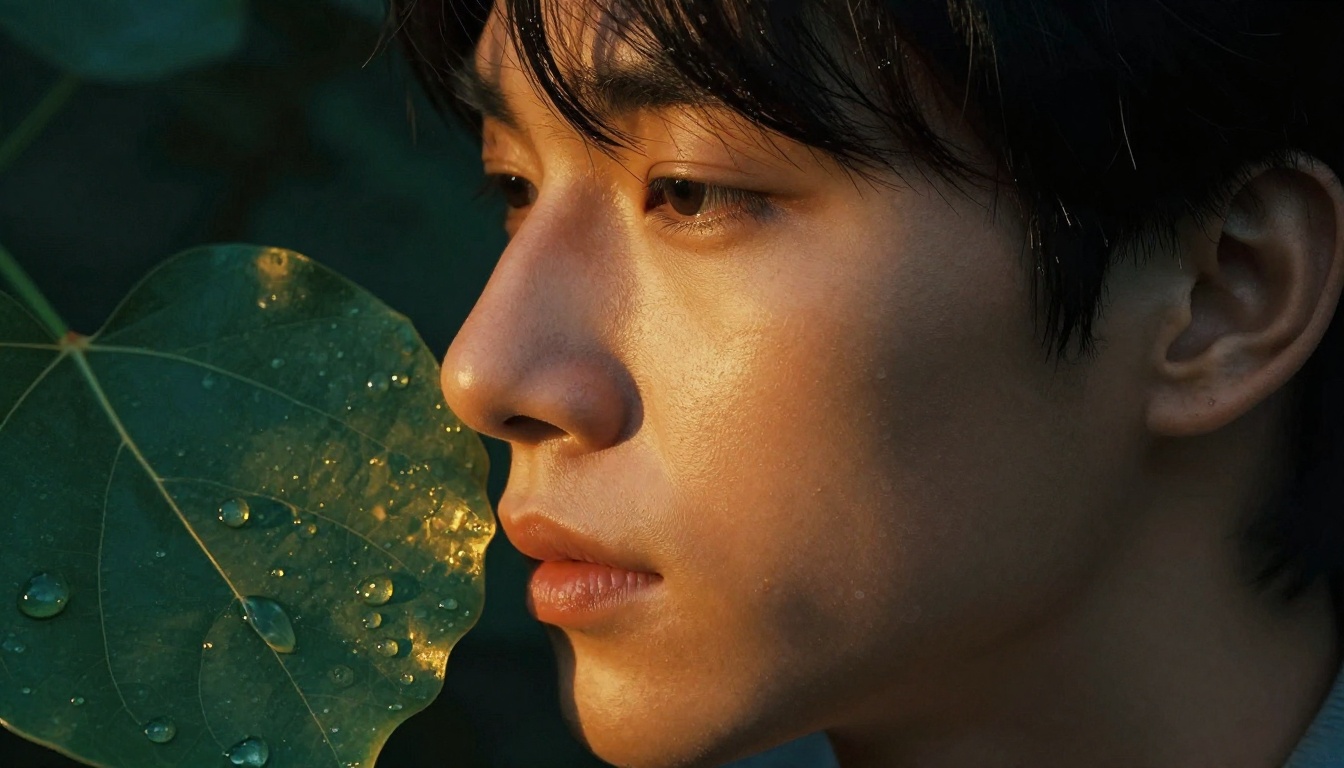
That’s subsurface scattering (SSS) at work. Light bounces inside materials like skin or leaves, scatters, and exits softer with a warm tint. Think sunlight hitting cheeks for a rosy flush, or leaf edges glowing golden at dusk.
As a digital artist using Photoshop or Procreate, you can paint SSS easily for hyper-realistic results. It adds depth without complex setups.
In the steps ahead, you’ll master SSS techniques for skin and foliage, so your art fools the eye every time. Let’s break down how light behaves first.
Unlock the Basics of Subsurface Scattering for Artists
Light hits most surfaces and bounces right off. That’s how metals shine with sharp reflections. But subsurface scattering works differently. Light slips into materials like skin or leaves, bounces around inside, and leaks out softer with a color shift. Skin often glows pink. Leaves show green hues. Picture milk in a glass; it scatters light to look creamy and translucent. Frosted glass does the same. This effect depends on three main factors. Thinner areas let light go deeper. The material’s own color tints the scatter. Brighter light amps up the glow.
Artists mimic this in subsurface scattering painting techniques to add realism. You control how light penetrates without fancy software. Let’s start with the key principles. They build your foundation.
Core Principles Every Painter Needs to Know
These four principles guide every SSS effect you paint. Grab a pencil and sketch them quick to lock them in. Focus on simple shapes first.
- Light penetration depth: Light travels farther in thin spots, like earlobes or leaf tips. Thicker areas block it sooner. Sketch a side-view ear with a gradient fade from edge to center; shade soft pinks deepest at the rim.
- Scattering colors: Materials tint the light as it bounces. Skin shifts to red or peach. Leaves mix yellow-green. Test with a basic ball; paint the shadow side warmer than direct light.
- Backlighting power: Strong light from behind boosts SSS most. It outlines forms dramatically. Draw a leaf against the sun; layer translucent yellows along the back edge, fading inward.
- Edge glow: SSS peaks at rims where light escapes easiest. Centers stay darker. Quick sketch idea: a cheek profile with a soft halo at the jawline; blend oranges outward from the contour.
Master these, and your subsurface scattering painting techniques feel natural. Practice on grayscale first. Add color later.
Spot SSS in Real Life: Skin and Leaves Edition
See SSS everywhere once you know what to look for. Hold your hand to a window on a sunny day. Notice the reddish glow through your fingers? That’s light scattering in your skin. Earlobes light up bright red in direct sun because they’re thin. Cheeks flush rosy near the nose. Leaves tell a similar story. Thin ones, like birch, glow golden when backlit. Veins pop dark against the scatter.
Try this at home. Shine a flashlight through your palm. Watch pink light seep out the edges. Do the same with a fresh leaf. Green tints emerge strongest at tips. These moments train your eye.
For photo references, hunt stock images of sunlit portraits or forest close-ups. Search “backlit ear closeup” or “translucent leaf macro.” Study edges first. Note how glow softens harsh shadows. Snap your own pics outdoors at dawn or dusk. Low sun angles reveal SSS best. Artists rely on these observations to nail subsurface scattering painting techniques in every piece. Your sketches will improve fast.
Stock Your Toolkit for Easy SSS Painting
You know the principles now. You spot SSS in real life. Next, gather your tools. They make painting subsurface scattering simple and fun. Start with basics that fit any workflow. Digital artists love soft brushes and smart layers. Traditional painters reach for glazes. Pick what matches your style. These picks keep things non-destructive, so you tweak without regret.
Focus on accessible options first. Free tools like Krita work great. Paid ones such as Clip Studio or Procreate shine too. Photoshop handles it all. Set up shortcuts for speed. Everyone builds glow fast.
Soft Brushes and Textures That Build Glow
Grab soft round brushes for smooth blends. Airbrush styles mimic light scatter best. Set opacity low, around 20 percent, for gradual buildup. Textured brushes add subtle noise to skin or leaf veins. In Procreate, use the Gouache brush. Krita offers free soft airbrushes. Clip Studio has customizable ones.
Why soft? They prevent harsh edges. Paint thin layers over base colors. Flow at 50 percent lets color seep in naturally. Test on a new layer. Erase mistakes easy.
Blending Modes and Adjustment Layers for Non-Destructive Magic
Layer blending modes transform your work. Overlay warms shadows. Soft Light adds gentle glow. Color Dodge boosts backlit edges without clipping. Stack them: base skin layer, then SSS on top in Soft Light.
Adjustment layers seal the deal. Add Curves for brightness. Hue/Saturation tints pinks or greens. Clip to your SSS layer. Everything stays editable. Duplicate for variations.
Must-Have Colors and Shortcuts
Warm pinks rule skin SSS. Mix cadmium red light with yellow ochre. Leaves need vibrant greens: phthalo green plus lemon yellow. Backlight with oranges.
Shortcuts speed you up. In Photoshop, B for brush, shift-plus for next brush. Procreate taps two fingers to undo. Krita binds Alt to eyedropper. Practice these. Your workflow flies.
Traditionalists, thin oils or glazes work. Layer translucent colors over dry underpainting. Same principles apply.
Stock these now. Your SSS paintings level up quick.
Paint Glowing Skin That Looks Alive: Your Step-by-Step Guide
You have the basics and tools ready. Now paint subsurface scattering on skin. Focus on portraits first. Target cheeks and ears because they show SSS best. These thin areas glow with pink light. Foliage comes later; skin needs warmer tones here.
Follow these six steps. They build realistic glow fast. Work on a new layer set to Normal at first. Use a soft airbrush. Keep flow at 40 percent. Sample colors from your base skin.
- Block base skin tones. Start with midtone fleshtone. Paint cheeks and ears smooth. Add basic shadows in blue-purple. Keep edges soft. This sets the canvas.
- Add rim light layer. Duplicate your base. Set to Overlay. Paint bright orange along backlit edges. Lower opacity to 30 percent. Focus on earlobes and cheek bones. This outlines the form.
- Build subsurface glow. New layer above rim. Set to Soft Light. Brush warm pinks inside edges. Feather toward centers. Stack another in Multiply for deeper shadows. Opacity stays low at 25 percent. Light seeps in naturally.
- Color shift edges. Clip a Hue/Saturation layer. Boost reds on rims. Slide saturation up 20 points. Mask to cheeks only. Ears get extra peach. This tints the scatter right.
- Blur and refine with dodge and burn. Switch to Dodge tool on midtones. Lighten inner glow spots. Burn softens transitions. Use a textured brush at 15 percent strength. Avoid overdoing it.
- Test with backlighting. Drop overall brightness. Add a white gradient from behind. Toggle it on and off. Check if glow holds. Adjust Curves if needed.
Practice these on a photo trace first. Results pop quick. Your skin looks alive now.
Layering Tricks for That Inner Glow Effect
Layers make SSS shine. Blend modes control how light scatters. Start simple. You already used Soft Light and Multiply in step three. They fit skin perfect.
Multiply deepens shadows inside. Paint thin red layers over base tones. It darkens without mud. Keep opacity between 20 and 40 percent. Too high kills subtlety. Screen works for highlights. Brush pale yellows where light exits. It brightens midtones gently. Opacity at 30 percent prevents harsh spots.
Masking keeps it clean. Paint full glow first. Then mask edges only. Use a soft black brush on the layer mask. Fade centers to zero. This traps light at rims, like real ears.
For example, on cheeks, mask a crescent shape near the nose. Light bounces there most. Stack three layers: Multiply base, Soft Light mid, Screen top. Group them. Clip to skin. Toggle visibility. You see buildup easy.
These tricks save time. No guesswork. Glow builds even.
Refine Skin Details Without Losing the SSS Magic
Details sell realism. Add them after glow. Dodge and burn on midtones first, as in step five. Dodge lifts pink areas softly. Burn tucks shadows. Stay at 10 percent exposure. Target cheeks’ curve.
Next, overlay textures. Grab a subtle skin grain brush. Set to Overlay at 15 percent opacity. It adds pores without flatness. Blend in veins on ears with a thin blue line, Soft Light mode.
Balance specular and diffuse next. Specular shines wet, like oil. Keep it small on nose tip. Diffuse scatters soft everywhere else. Test: specular at 5 percent white highlights. Diffuse fills the rest pink.
Before: Flat skin looks plastic. Harsh shadows kill depth. After: Glow warms edges. Textures ground it. Dodge/burn adds form.
Compare side by side. Duplicate your canvas. Flatten one copy. Apply steps to the other. Toggle layers. Difference stuns. Your portraits fool viewers now.
Keep SSS pure. Details enhance, not fight it. Adjust as needed. Skin breathes life.
Make Leaves and Petals Shimmer: SSS for Foliage Mastery
Leaves and petals bring SSS to life in bold ways. Unlike skin, they scatter light more uniform because thinner tissues let rays punch through easy. Chlorophyll adds that signature green glow, so backlighting turns edges into fiery halos. You adapt the skin steps here, but swap pinks for yellow-greens and focus on veins. Thicker centers block light faster, yet rims explode with color. Result? Foliage that shimmers real.
Follow these five plant steps. They build glow fast. Use soft brushes at 30 percent flow. Work on separate layers for tweaks. Sample from reference leaves outdoors.
- Block base green tones. Paint midtone greens first, like phthalo mixed with lemon yellow. Cover the leaf shape smooth. Add dark veins in navy blue. Keep shadows soft because light penetrates thin spots. This sets your canvas solid.
- Boost vein translucency. New layer in Overlay mode. Brush pale lime along veins from behind. Lower opacity to 25 percent. Light peeks through like real birch leaves. Mask thicker areas dark. Veins pop without mud.
- Build edge halos in yellow-green. Duplicate base. Set to Soft Light. Stroke bright chartreuse at rims. Feather inward quick. Stack a Multiply layer for shadow depth. Halos mimic sun through maple tips. Opacity stays low at 20 percent.
- Scatter light through thickness. Clip Hue/Saturation. Shift greens warmer toward gold. Dodge midtones inside edges soft. Burn centers to ground form. Light fades natural across varying thickness, unlike skin’s rosy flush.
- Add wind and dynamic effects. New layer for motion. Smudge edges outward slight with a textured brush. Drop noise filter at 10 percent for flutter. Test backlighting gradient. Toggle to check shimmer holds in breeze.
These steps highlight key diffs. Plants scatter even because cells pack tight. Skin varies with fat and muscle. Chlorophyll glow stays green-yellow, so skip reds. Practice on a single leaf trace. Your foliage breathes now.
Handle Backlit Leaves Like a Pro
Backlit leaves demand rim lighting first. Strong sun from behind outlines every curve. Start with a soft white stroke at edges. Blend in gradient maps next. They control scatter smooth.
Create one in Photoshop or Procreate. Map black to dark green centers, white to yellow rims. Overlay at 40 percent. Light transitions real. Add noise for texture because leaves wrinkle natural. Gaussian blur slight, then overlay grain brush. Veins catch shadows crisp.
Autumn leaves differ from tropical. Fall ones glow orange-red because pigments break down. Paint rusty halos with burnt sienna plus yellow. Tropical stay vivid green. Use emerald rims with lime scatter. Both shine, yet autumn feels warm. Test both side by side.
For example, sketch a backlit oak leaf at dusk. Rim glows amber. Noise adds dry crunch. Tropical fern glows neon in midday sun. Uniform scatter fills thin fronds full. Pro tip: sample real photos at golden hour. Your rims fool eyes every time.
Blend Foliage into Scenes Seamlessly
Foliage sits best when it melts into backgrounds. Depth of field blurs distant leaves soft. Gaussian on layers far back. Foreground stays sharp for pop.
Color harmony matters most. Match greens to sky or skin nearby. Warm sunlight tints all yellow slight. Cool shade adds blue undertones. Avoid muddy greens by desaturating shadows only. Boost contrast with Curves clipped per layer.
Mix with skin? Balance rosy cheeks against leaf glows. Skin pinks complement yellow halos. Paint interactive light: leaf shadows on face in soft purple. Scene unites.
Here is how to nail it quick:
- Sample environment hues first. Eyedropper sky blue into leaf shadows.
- Feather edges always. No hard lines kill depth.
- Group foliage layers. Adjust overall tint together.
Test in full comp. Zoom out. Leaves integrate perfect. No floating blobs. Your scenes feel alive as a result.
Dodge SSS Pitfalls and Boost Your Results Fast
Even pros hit bumps with subsurface scattering. You paint a glowing cheek or leaf edge, but it looks fake. Common mistakes kill the realism fast. Luckily, quick fixes turn errors around. Spot these five pitfalls now, and your SSS shines brighter. You’ll save hours and get pro-level results right away.
Five Common SSS Errors and Their Simple Fixes
Artists mess up SSS in predictable ways. Here’s how to catch and correct them quick. Each fix takes under a minute.
- Over-bright glows: Your rims blind viewers because light blasts too strong. Dial opacity down to 15 percent on Screen layers. Add a dark Multiply pass over centers. Glow softens natural.
- Wrong colors: Skin turns orange instead of rosy pink. Or leaves glow blue-green. Sample real references first. Use Hue/Saturation to shift back; drop reds 10 points for skin, boost yellows for foliage. Colors match life now.
- Ignoring thickness: Thick cheeks stay dark flat, while thin ears overglow. Map gradients by area. Paint deeper pinks only on lobes; fade fast toward muscle. Test with a side profile sketch.
- Flat layers: SSS blends to mush with no depth. Stack three modes: base Normal, mid Soft Light, top Overlay. Mask each sharp. Layers pop with form.
- Harsh backlighting edges: Rims cut hard like paper. Blur tool at 5 pixels, then dodge midtones soft. Feather in a gradient mask. Edges breathe real.
Apply these tweaks mid-process. Duplicate your canvas first. Compare before and after. Results jump fast.
Pro Tips to Speed Up and Perfect Your SSS Game
Want faster workflow? Build habits that stick. Start a reference library today. Save 20 backlit skin and leaf photos in a folder. Tag by angle and time of day. Pull them open during paints.
Practice swatches daily. Sketch five-minute grids: one row skin tones, next leaves. Test blends side by side. Muscle memory kicks in after a week.
For speed, record actions in Photoshop or Procreate macros. One click adds SSS stack: rim layer, glow, adjustments. Bind to a hotkey. You cut setup time half.
These steps compound. Your art levels up steady.
Stick with it. Fix one pitfall per session, and soon SSS feels easy. Your skin and leaves fool everyone. Paint bold; results reward you big.